Auto Read More with thumbnail for Blogger/Blogspot Posts

Posted by Unknown Sabtu, 17 Maret 2012 0 komentar
This hack will summarize content and show only summary in Home page, Archives Page and Label Page using Automatic Read More simple script in your template. Using automatic read more on your blog will make your blog load faster by showing few post instead of the full post on the homepage.
Automatic read more for blogger posts can be done by inputting some code into your blog templates.

How to install Automatic Read More Hack for Blogger

There are two options you can choose from:

1. Auto readmore for all the posts:

Step 1. Find (CRTL + F) this code:

<data:post.body/>

Step 2. And replace with this:

<b:if cond='data:blog.pageType != &quot;item&quot;'>
 <b:if cond='data:blog.pageType != &quot;static_page&quot;'>
  <div>
   <b:if cond='data:post.thumbnailUrl'>
    <img class='post-thumbnail' expr:alt='data:post.title' expr:src='data:post.thumbnailUrl' width='72px' height='72px'/>
   </b:if>
   <data:post.snippet/>
  </div>
  <div class='jump-link'>
   <a expr:href='data:post.url' expr:title='data:post.title'><data:post.jumpText/></a>
  </div>
 <b:else/>
  <data:post.body/>
 </b:if>
<b:else/>
 <data:post.body/>
</b:if>

2. Read more only for older posts (your latest post will appear normal):

Find (CTRL + F) and replace <data:post.body/> with:

<b:if cond='data:blog.pageType != &quot;item&quot;'>
 <b:if cond='data:blog.pageType != &quot;static_page&quot;'>
  <b:if cond='data:blog.url == data:blog.homepageUrl'>
   <b:if cond='data:post.isFirstPost == &quot;true&quot;'>
    <data:post.body/>
     <b:if cond='data:post.hasJumpLink'>
      <div class='jump-link'>
       <a expr:href='data:post.url + &quot;#more&quot;' expr:title='data:post.title'><data:post.jumpText/></a> 
      </div>
     </b:if>
   <b:else/>
    <div>
     <b:if cond='data:post.thumbnailUrl'>
      <img class='post-thumbnail' expr:alt='data:post.title' expr:src='data:post.thumbnailUrl' width='72px' height='72px'/>
     </b:if>
     <data:post.snippet/>
    </div>
    <div class='jump-link'>
     <a expr:href='data:post.url' expr:title='data:post.title'><data:post.jumpText/></a>
    </div>
   </b:if>
  <b:else/>
   <div>
    <b:if cond='data:post.thumbnailUrl'>
     <img class='post-thumbnail' expr:alt='data:post.title' expr:src='data:post.thumbnailUrl' width='72px' height='72px'/>
    </b:if>
    <data:post.snippet/>
   </div>
   <div class='jump-link'>
    <a expr:href='data:post.url' expr:title='data:post.title'><data:post.jumpText/></a>
   </div>
  </b:if>
 <b:else/>
  <data:post.body/>
 </b:if>
<b:else/>
 <data:post.body/>
</b:if>

Settings:

A. If you want the thumbnail to appear on the left:

Step 1. Find (CTRL + F) the following piece of code:

]]></b:skin>

Step 2. Just above it, paste this code:

.post-thumbnail{float:left;margin-right:20px}

B. If you want the thumbnail to appear on the right,

Paste above ]]></b:skin> this code:

.post-thumbnail{float:right;margin-left:20px}

Click Preview and if it works, click Save Template.

That's it, enjoy!

Baca Selengkapnya ....

Adsense Ad Code Converter

Posted by Unknown Jumat, 16 Maret 2012 0 komentar

This tool automatically converts javascript ad code into the correct format so you can embed it directly into your new xml Blogger template. It’s perfect for converting AdSense, AdBrite, Chitika or any other javascript ad code you may have.


Instructions: paste your Adsense code in the empty box and then press on the "Convert" button.

Baca Selengkapnya ....

How to put Adsense ads on Blogger/Blogspot

Posted by Unknown 0 komentar

If you want to earn money from your site/blog, Google Adsense is the most popular service to monetize your blog or website content. When implemented, Adsense will display targeted Google ads on your blog and they can generate revenue on either a per-click or per-impression basis.
Of course, to display ads on your site, you should first Sign Up to Google Adsense program.


Before adding your ads, keep in mind that Adsense allows only up to 3 ad units, 3 link units and 2 search boxes per page.

In this tutorial i will show you the three ways you can add Adsense ads to your blog.

1. Adsense Gadget

Use this method to add ad unit as a widget, in places outside the blog post area. You can position it by simply dragging it in Page Elements, just like any other widget. To add the Adsense Gadget, go to:

1. Blogger Dashboard >> Design >> Page Elements >> click on the "Add a Gadget" link
2. From the pop-up window, select AdSense Gadget:

3. Configure ad format and colors.
4. Click Save and you're done.

2. Inline Ads

This will display an ad unit at the end of each post. To show ads between posts:

1. Go to Design > Page Elements and click the Edit link in Blog Posts gadget box.


2. Check the "Show Ads Between Posts" box.


3. Configure ad frequency, ad format, and colors. Live preview is provided beneath the settings.
4. Click Save.

3. Adsense code

The most notable benefits of using this method are:
  • You can place ad anywhere in your blog
  • You can add the code anywhere in your blog template - in your post content or page.
  • To find out which format perform the best, custom channels will help you to track the performance of specific groups of ad units.
  • You can choose types other than ad unit i.e. link unit, search box.
To create an ad unit:
1. Go to Google Adsense website.
2. Click on My ads tab, go to Ad units and then press on the "New ad unit" button.


3. Choose your ad type, choose format and colors and assign channels.
4. When you have finished editing, click on the Save and get code >> button and copy the code provided.

To add an ad unit to your blog, you have the following options:

  • Paste the code in a HTML/Javascript gadget
  • Paste the code in a blog post or page, or
  • Paste the code direct in your template. (if you choose this option, first you should convert adsense ad code)

If you have any more questions, leave a comment below.

Baca Selengkapnya ....

How To Remove Blogger Threaded Comments

Posted by Unknown Senin, 12 Maret 2012 0 komentar
The Blogger Threaded commenting system allows a reader to reply to other reader comments on that post. Blogger supports threaded commenting with two levels - the original comment, and the replies to that comment. If you want remove threaded comments from your blogger blog, follow these steps:


Step 1. Go To Blogger Dashboard > Template > Edit HTML (click on Proceed button if needed)


Step 2. Select "Expand Widget Templates" (back up your template)


Step 3. Search (using CTRL + F) for the following code:

<b:if cond='data:post.showThreadedComments'>
            <b:include data='post' name='threaded_comments'/>
          <b:else/>
            <b:include data='post' name='comments'/>
          </b:if>
        </b:if>
        <b:if cond='data:blog.pageType == &quot;item&quot;'>
          <b:if cond='data:post.showThreadedComments'>
            <b:include data='post' name='threaded_comments'/>
          <b:else/>
            <b:include data='post' name='comments'/>
          </b:if>
        </b:if>

Step 4. Now remove it (you'll find this code twice and replace it twice) and paste this code instead:

   <b:include data='post' name='comments'/>
          </b:if>
               <b:if cond='data:blog.pageType == &quot;item&quot;'>
                     <b:include data='post' name='comments'/>
     
        </b:if>

Step 5. Save Template.

That was all!


Baca Selengkapnya ....

Add Videos/Images in Blogger/Blogspot Comments

Posted by Unknown 0 komentar
Many of you maybe have wondered if it is possible to post Youtube videos and images into Blogger comments. With this trick it will (: But first of all, you should know that if you have blogger threaded comments activated, it won't work. So if you want to have this feature, firstly, you should remove blogger threaded comments.

Read here on How to Remove Blogger Threaded Comments.

How to add videos/images in Blogger comments

Step 1. Go to Dashboard >> Template >> Edit HTML (click on Proceed if needed)


 Step 2. Select "Expand widget templates" box (make a backup)

Step 3. Find (using CTRL + F) the following tag:

</body>

Step 4. Paste the code below, immediately above/before that tag:

<b:if cond='data:blog.pageType == &quot;item&quot;'>
<script type='text/javascript'>
//<![CDATA[
function replaceText(){if(!document.getElementById){return;}
bodyText = document.getElementById("multimedia");
theText = bodyText.innerHTML;
theText = theText.replace(/\[img\]/gi, "<div style='clear:both'></div><img style='float:left;margin:10px 0;border:1px solid #DDD;max-width:490px;background:#FFF;padding:4px' src='");
theText = theText.replace(/\[\/img\]/gi, "'/><div style='clear:both'></div>");
theText = theText.replace(/\[youtube\]http:\/\/youtu.be/gi, "<iframe width='480' height='390' src='http://www.youtube.com/embed");
theText = theText.replace(/\[youtube\]http:\/\/www.youtube.com\/watch\?v=/gi, "<iframe width='480' height='390' src='http://www.youtube.com/embed/");
theText = theText.replace(/&amp;feature=/gi, "?rel=0' '");
theText = theText.replace(/\[\/youtube\]/gi, "?rel=0' frameborder='0' allowfullscreen></iframe>");
theText = theText.replace(/\[youtube\]http:\/\/www.youtube.com\/watch\?v=/gi, "<iframe width='480' height='390' src='http://www.youtube.com/embed/");
theText = theText.replace(/\[\/youtube\]/gi, "frameborder='0' allowfullscreen></iframe>");bodyText.innerHTML = theText;
}replaceText();
//]]>
</script>
</b:if>

Step 5. Now find (CTRL + F) this code:

<b:loop values='data:post.comments' var='comment'>

Step 6. Add the following code just above it:

<div id='multimedia'>

Step 7. Now find:

</b:loop>

Note: look for this piece of code after the code on the step 5.

Step 8. Just after, paste this piece of code:

</div>

Step 9. Save template.

Instructions

Now everytime you want to post images & videos in comments, you should add the following tags at the beginning and end of the url of your youtube videos or images you want to share:

For example:

We have this Youtube URL:
www.youtube.com/watch?v=jEgX64n3T7g

  • To add a youtube video in blogger comments, we'll have to add the red codes at the beginning and end of the youtube URL of the video:
    [youtube]www.youtube.com/watch?v=jEgX64n3T7g[/youtube]
    • To add images in blogger comments, add these codes at the beginning and at the end of your image url:
    [img]your-image-url[/img]

    Note: replace your-image-url with the url address of your image

    Settings

    To tell your visitors on how to post images and videos into your blogger comments, you can add a message just above your blogger comment form.

    Just go to Dashboard >> Settings >> Posts and Comments - and look for the Comment Form Message section, click on "Add" link and add this text:

    If you want to post a youtube video or a image in your comment, use <b>[img]YOUR-IMAGE-URL-HERE[/img]</b> for posting images and <b>[youtube]YOUTUBE-VIDEO-URL-HERE[/youtube]</b>

    See this screenshot for more info:


    Now click on the "Save Settings" button on the top right corner and you're done!

    If you enjoy reading this blog, please share and subscribe. For any questions, drop a comment below.


    Baca Selengkapnya ....

    How to add Facebook Like/Fan Box to Blogger

    Posted by Unknown 0 komentar
    A Facebook Fan Box or Like Box is a great plugin that allows blog visitors to subscribe to your blog updates via their Facebook accounts, without leaving your blog. After subscribing (by pressing like button), visitors will receive your most recent blog updates on their Facebook page. This box also displays faces of the "likers" on your blog. Before creating a fan box you should already have a facebook fan page. If you haven't yet created, click here to learn How to Create a Facebook Fan Page.


    Add Facebook Like Box to Blogger

    1. Find out your Facebook fan page URL by visiting your Facebook fan page and copy the url in the address bar, you can see how your url should look like in my screenshot:


    2. Then visit this page: http://developers.facebook.com/docs/reference/plugins/like-box

    3. Paste your url into the Facebook Page URL field as it is shown below:


    4. Once you are satisfied with the looks of the Like Box, click on the "Get Code" button

    5. You'll be given two codes, titled HTML 5, XFBML and IFRAME. You only need the iframe code.
    Select it and copy the code generated for your box as it is shown in the example below:


    6. Then go to your Blogger Dashboard > Layout > click on the Add a Gadget link


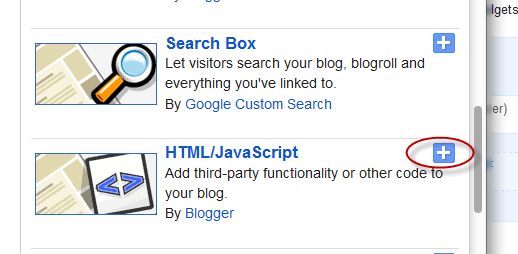
     7. From the pop-up window, scroll down and select HTML/JavaScript


    8. Paste the code in the empty HTML box.


    9. Click Save and you're done.

    Baca Selengkapnya ....

    Add Recent Comments Widget with Avatars To Blogger

    Posted by Unknown 0 komentar
    In the past tutorial, I've shared a simple Recent Comments widget, now you have the option to add a stylish Recent comments widget with round avatars, which comes along with comment excerpts. You also have the option to change default Anonymous Avatar Image.


    How to add recent comments widget with avatars

    Step 1. Go to Blogger Dashboard, then go to Layout and click on Add a Gadget link.

    avatars, recent comments blogger, blogger widgets

    Step 2. In the popup window scroll down + choose HTML/Javascript


    Step 3. Paste in the following code in the empty box:

    <style type="text/css">
    ul.w2b_recent_comments {
        list-style: none;
        margin: 0;
        padding: 0;
    }

    .w2b_recent_comments li {
        background: none !important;
        margin: 0 0 6px !important;
        padding: 0 0 6px 0 !important;
        display: block;
        clear: both;
        overflow: hidden;
        list-style: none;
    }

    .w2b_recent_comments li .avatarImage {
        padding: 3px;
        background: #fefefe;
        -webkit-box-shadow: 0 1px 1px #ccc;
        -moz-box-shadow: 0 1px 1px #ccc;
        box-shadow: 0 1px 1px #ccc;
        float: left;
        margin: 0 6px 0 0;
        position: relative;
        overflow: hidden;
    }

    .avatarRound {
        -webkit-border-radius: 100px;
        -moz-border-radius: 100px;
        border-radius: 100px;
    }

    .w2b_recent_comments li img {
        padding: 0px;
        position: relative;
        overflow: hidden;
        display: block;
    }

    .w2b_recent_comments li span {
        margin-top: 4px;
        color: #666;
        display: block;
        font-size: 12px;
        font-style: italic;
        line-height: 1.4;
    }
    </style>
    <script type="text/javascript">
    //<![CDATA[
        // Recent Comments Settings
        var
     numComments  = 5,
     showAvatar  = true,
     avatarSize  = 60,
     roundAvatar = true,
     characters  = 40,
     showMorelink = false,
     moreLinktext = "More »",
     defaultAvatar  = "http://www.gravatar.com/avatar/?d=mm",
     hideCredits = true;
    //]]>
    </script>
    <script type="text/javascript" src="http://helplogger.googlecode.com/svn/trunk/w2b recent comments with avatars.js"></script>
    <script type="text/javascript" src="http://your-blog.blogspot.com/feeds/comments/default?alt=json&callback=w2b_recent_comments&max-results=5"></script>

    Note
    Replace your-blog with the name of your blog.
    Replace the "5" values in red, with the number of comments you want to appear... from:

    • numComments  = 

    and

    • &max-results=5 

    To change the anonymous avatar, replace the following address with your own:
    • http://www.gravatar.com/avatar/?d=mm 

    To change the size of the avatar, replace 60 value in green with your own

    Step 4. After you've made the changes, click Save... and you're done!

    The credit goes to Hrish @ way2blogging.org

    Baca Selengkapnya ....
    Trik SEO Terbaru support Online Shop Baju Wanita - Original design by Bamz | Copyright of Android rush.